 |
| Test |
Here's the first experiment I did just to adjust myself on how to make a panoramic image on Photoshop. It was a small section that I chose and I used around 4 vertical images for this panoramic. This test emphasises how important it was to make sure the exposure is consistent or it would look like this with the sky. It is also important that we pan as straight as possible to allow it to fit easily.
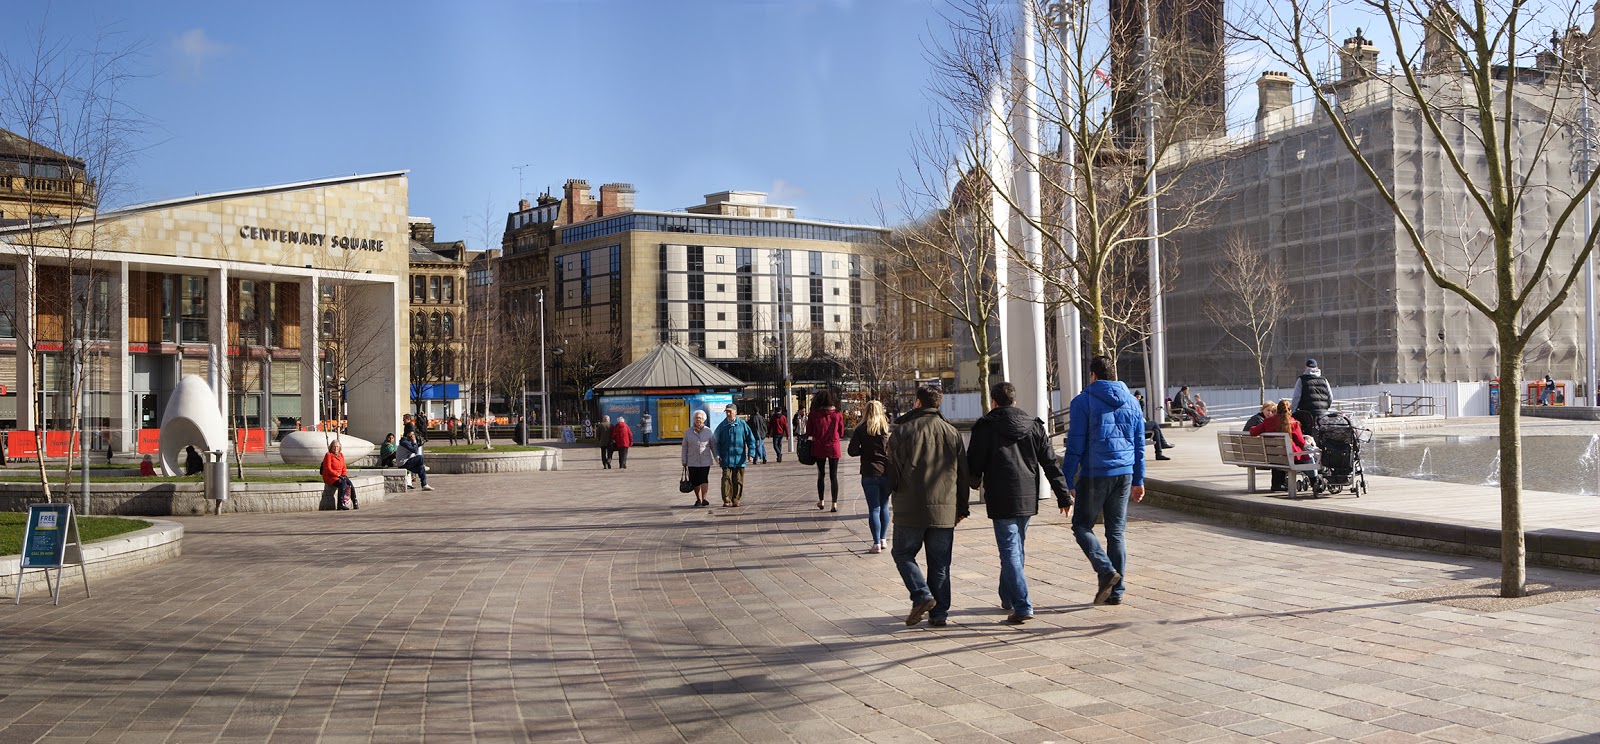 |
| Centenary Square |
This panoramic image was made with a few images. It was a good attempt and the individual images worked with the overlay. The only problems I've encountered as I was editing this image was with ghosted elements. Like some building will look fuzzy because the overlay is slightly not in line. So when I erase some off, the exposure would change from the overlay to the image under. This gave it different shades to the sky. Also, a big issue was people around! That has created so much ghost and erasing them on one would just create so much complications with layers. Hence why this image isn't completely sharp in some areas but overall it was a good attempt.
 |
| Panoramic - Playing with Shadows |
The reason I've created this panoramic was to experiment with shadows. As you can see in this location at the time, there is a big shadow that is present. I thought it would a good chance to make a panoramic with this element. It is also a contrast with the blue sky. Surprisingly, the results weren't too bad. The only thing was the slight ghost effect on the car driving past. But I've edited that in a way where it looks like movement. I think with using some basic editing like adjusting brightness and contrast will make the image more appealing. But I was mainly focusing on the panoramic side of things.
 |
| Panoramic - Panning Style |
This panoramic was created using a different method. I was experimenting with using a panning movement. Instead of giving it this oval angle as I twist around, I was capturing in a 180 degrees angle so it looks straight and flat. This was by keeping the camera straight and moving left or right rather than twisting the camera. The road I've done this experiment is actually on a slight hill so it looks distorted but it's initially like that. I think if I had more time, I'd try doing panoramic at low angles but this would be harder because we'd have to keep the camera straight and and turn it whilst being at a low angle.
 |
| Best attempt at panoramic images. |
This image is the best panoramic image in terms of technique. I was trying hard to make sure to get less shots that overlay to reduce any confusion on Photoshop. Then as I was editing it together, it was easy to get rid of any ghosts or blurry bits. I think it joined well and the lighting in the image is good and consistent due to the manual exposure.
 |
| Longest panoramic image created. |
Here is another example taken at Centenary Square like before. This is the longest panoramic image I've created using like 10 images. It was challenging to edit this because when I erased some bits, it would change the colour of the sky and make it look ghosted and fuzzy. I tried my best with the editing as I was removing ghosts of people and the buildings. But overall I like the high angle with the wide look. It really compliments new and old architecture because it's surrounded around the image.
 |
| Vertical Panoramic |
Lastly, this panoramic was made in a vertical orientation. This required me to take images in a landscape orientation so it can be joined together top to bottom. As you can perhaps notice, you can see the building is starting to bend. This is because of converging lines. However, the exposure is not too bad and the edit to join together wasn't too hard. There are some minor lighter elements you can see but I think it's quite a cool panoramic. The lamppost are straight upwards in the shot alongside the telephone box. This could be linked to scale of the building. In the back, you can also see the town hall which is part of the old architecture aspect.
Experimenting with Panoramic Images:
 |
| New architecture, scary effect |
These are additional experiments I've created based upon communication with our panoramic image. I've used this modern architecture building and turned it into this scary styled image. By adding noise and vignette, it gives the image a whole new meaning. From this bright, colourful building to this dark, spooky look.
 |
| New architecture, scary effect after |
This is the same image with further experimentation for a deeper emphasis on the scary element. I've used the smudge tool on a small brush and made some bits smudged to give it this freaky look. The smudged element reminds me of TV static that is usually a component of the horror genre. Movie posters use this technique of blurring because it gives this mysterious feel to the image. It just has this scary vibe to it because it's kind of abnormal to see.
 |
| Old architecture, old image effect |
Here's an old architecture panoramic image with some thoughtful communication effects. I've made the shadows dark and added some brown tint which was adjusted with opacity. Also desaturated the image a little so it's not too vibrant. All these were done to portray this old image effect. The buildings in this image are old and I think it has a nice feel to it as the buildings are vanishing away. The shadow is used to contrast the building and just adds that darkness to the image that is needed to enhance this old effect. It looks like an old image has been found after years with the colour effects.
No comments:
Post a Comment